How To Draw A Cloak
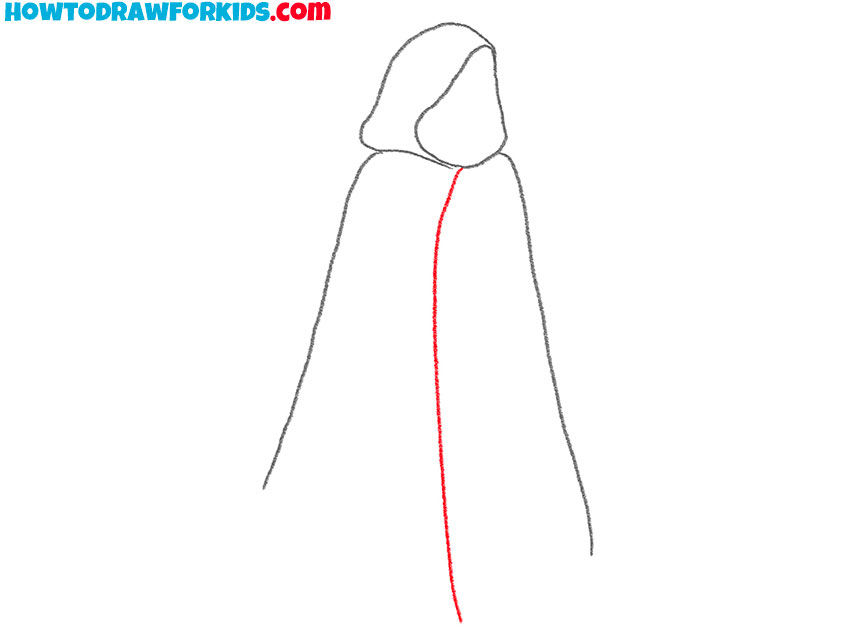
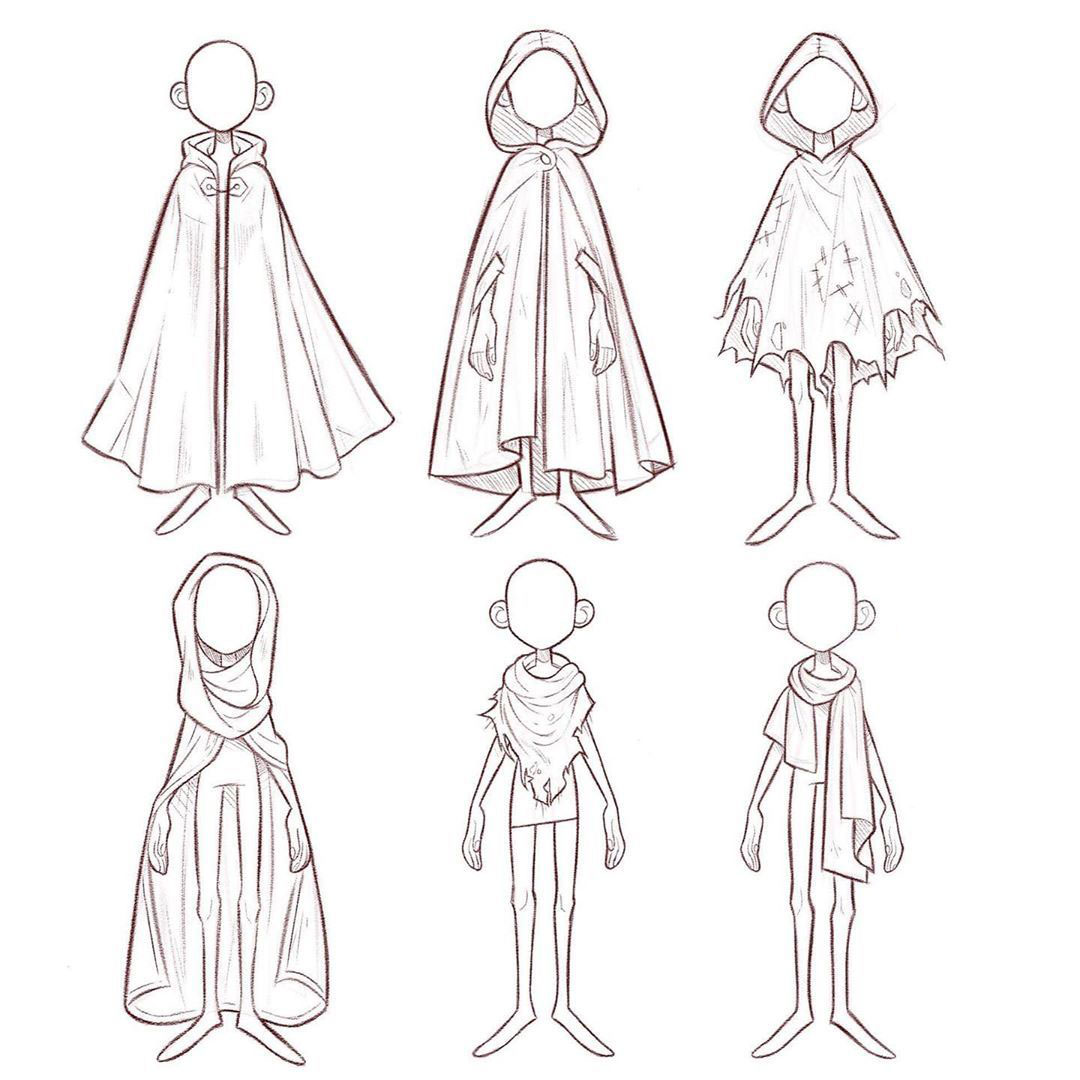
How To Draw A Cloak - Web lets draw cloaks!! Web draw a curved line for the top of the cloak, creating the hood. In this example, my drawing tips will show you how to make a cloak look old and torn. Draw the edges of the cloak contouring the. When adding highlights, don’t be afraid to go bold. Web lines will generally be drawn to them against gravity. Web then, pin the rest of the hood onto the neckline of the cloak. Web unleash your inner artist and learn how to draw a realistic cloak in just 5 easy steps. We will start with this sleeve, and you can draw it with lots of curved lines connecting to one another and dropping down. Web in this video we'll show you how to draw a cloak. Artist advice art reference for drawing clothing (clothes) wrinkles and drapery // dailyriana: Connect the arcs with a wavy line to form the bottom of the cloak. Pause as you need to and. Next, draw the outline of the cloak’s shape. Furthermore, the cloak isn't new so the fabric needs to look. Web unleash your inner artist and learn how to draw a realistic cloak in just 5 easy steps. On the left side, draw a rounded line of the same shape as in the example. Easy drawing tutorials for beginners, learn how to draw animals, cartoons, people and comics. Sew a straight stitch 0.5 in (1.3 cm) from the hood and neck edges. Web lets draw cloaks!! Next, draw the outline of the cloak’s shape. We will start with this sleeve, and you can draw it with lots of curved lines connecting to one another and dropping down. This arm will have a hand pointing into the air, and it will be clad in a loose, flowy sleeve. For the colours, the tones must be desaturated. Easy. There are several options to consider if you want to learn how to draw worn clothing. Please like comment subscribe to my channel to see more interesting videos ! Web this is a digital download. Include some folds, creases, and a clasp or brooch to complete the. Depict one side of the cloak. Web start sketching your own cloak today! Furthermore, the cloak isn't new so the fabric needs to look. Repeat the previous step and depict a long, smooth line on the other side. Web lets draw cloaks!! Web learn how to draw a cloak with this tutorial. This will allow you to easily pull the pins out before you sew over each area. Connect the arcs with a wavy line to form the bottom of the cloak. Repeat for the other side. Web lines will generally be drawn to them against gravity. Large format files are also included. This will give your cloak depth and dimension. Depict one side of the cloak. We will start with this sleeve, and you can draw it with lots of curved lines connecting to one another and dropping down. Artist advice art reference for drawing clothing (clothes) wrinkles and drapery // dailyriana: Furthermore, the cloak isn't new so the fabric needs to. Web draw a curved line for the top of the cloak, creating the hood. Sew a straight stitch 0.5 in (1.3 cm) from the hood and neck edges. [13] place 1 pin every 2 to 3 inches (5.1 to 7.6 cm) so that they are perpendicular to the fabric. Web thanks for watching, like, comment, share, and subscribe!how to draw. The stiffness of the cloth will then determine how bunched up or folded the lines will be. Add a wavy line along the bottom to create the cloak’s opening. [13] place 1 pin every 2 to 3 inches (5.1 to 7.6 cm) so that they are perpendicular to the fabric. Web add the outer outline of the hood. Web this. Start by lightly sketching the basic shape of the cloak on your drawing paper. Artist advice art reference for drawing clothing (clothes) wrinkles and drapery // dailyriana: This guide is very simple and consists of only nine easy steps. I finally managed to acquire a poncho in the style of the ones my characters in my comic wear and these. This guide is very simple and consists of only nine easy steps. In this step of our guide on how to draw a wizard, we will be drawing his first arm. On the left side, draw a rounded line of the same shape as in the example. Repeat for the other side. Please like comment subscribe to my channel to. Choose a dark pencil or pen for the shadows and highlights. Web this is a digital download. [13] place 1 pin every 2 to 3 inches (5.1 to 7.6 cm) so that they are perpendicular to the fabric. Artist advice art reference for drawing clothing (clothes) wrinkles and drapery // dailyriana: There are several options to consider if you want. Essentially, lines from the anchor point to the ground. Choose a dark pencil or pen for the shadows and highlights. There are several options to consider if you want to learn how to draw worn clothing. You can make the cloak dramatically dragging behind the person, or make it more modest to give the cloak an elegant look. Artist advice art reference for drawing clothing (clothes) wrinkles and drapery // dailyriana: In this example, my drawing tips will show you how to make a cloak look old and torn. Furthermore, the cloak isn't new so the fabric needs to look. This guide is very simple and consists of only nine easy steps. The stiffness of the cloth will then determine how bunched up or folded the lines will be. In this step of our guide on how to draw a wizard, we will be drawing his first arm. Repeat for the other side. Web lines will generally be drawn to them against gravity. Web learn how to draw a cloak with this tutorial. Pause as you need to and. Large format files are also included. Web once you like the shape of your cloak, you can start filling it in with color.
How to Draw Cloaks CraftyThinking

Tuesday Tips Cape It Simple! I don't need to add too much explanation
How to Draw a Cloak Easy Drawing Tutorial For Kids

How to Draw a Cape Really Easy Drawing Tutorial

How To Draw A Cloak Northernpossession24

How To Draw A Cloak Drawingforall Net vrogue.co
Cloak Drawing Reference and Sketches for Artists

Ideas Red Riding Hood Cloak by angryfisheatenbycat Art reference
Black cloak by MiSt29 on DeviantArt

How To Draw A Cloak
Web Start Sketching Your Own Cloak Today!
This Arm Will Have A Hand Pointing Into The Air, And It Will Be Clad In A Loose, Flowy Sleeve.
Web How To Draw A Cloak Easy Step By Step For Beginners.
When Adding Highlights, Don’t Be Afraid To Go Bold.
Related Post: